Ne zamandır paylaşmak istiyordum bu projeyi sizlerle ama nedense … yok
yok nedense demeyeceğim, nedeni belli… Şimdi mırın kırın yapacak değilim aklım
başka yerlerde olduğu ve bloğumla yeteri kadar ilgilenemediğim için bir postu
bile 3 günde hazırlar olduğum için hep erteledim.
Çok basit bir kendin yap projesi bu. Hani dikiş makinası olmayıp da
kumaşlarım olsun, onlarla oynayayım diyenler var ya hah işte tam sizlik bu
çatal kaşıklık. Dikiş makinası kullanmadan sadece 5-6 dakikada
yapılabilirsiniz.
Ben bu projeyi önce Handmade Happy Craft Magazinin geçen seneki yaz
sayısı için hazırlamıştım. Claire’in bloğunda diğer online dergiler ile
birlikte bu sayıyı da görebilirsiniz. Hem Claire’in yenilenmiş bloğuna da bir
göz atmış olursunuz. Pek şık olmuş.
Çok sevince bir de Romantic Homes Dergisinin Temmuz sayısı için yaptım
tekrardan.
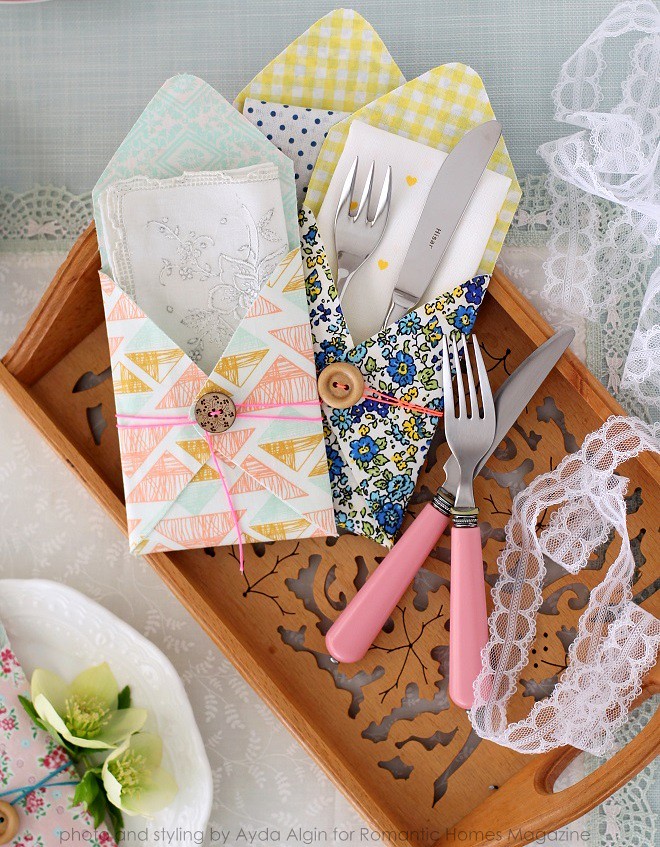
Bu basit proje ile sofralara biraz sevimlik katabilirsiniz. Ayrıca
piknikte kullanım için de idealller.
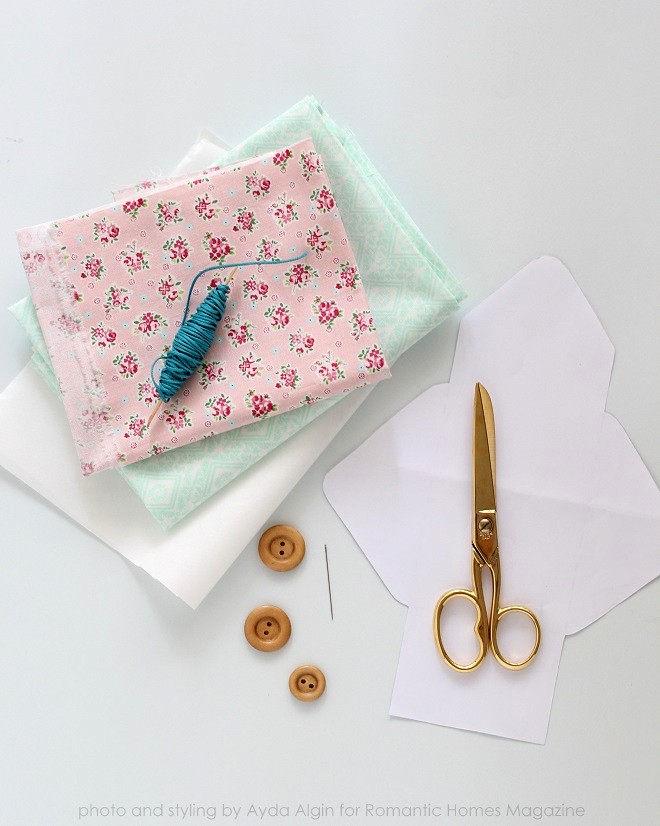
İhtiyacınız olan malzemeler ;
·
İki parça
desenli kumaş ( 30 x 25 cm)
·
Yapışkanlı
kağıt tela (30 x 25 cm)
·
Makas
·
Kalem
·
Ütü
·
Neon
renklerde iplik
·
Ahşap
Düğme
·
İğne
·
Kalıp (
Kalıp için buraya buyrun)
Gelelim yapımına; İlk önce iki kumaş parçasından birinin ters yüzüne
yapışkanlı telayı ütü ile güzelce yapıştırıyoruz. Sonra kalın kağıdı çıkartıp
diğer kumaşın ters yüzünü yapışkanlı tarafa koyup tekrar ütülüyoruz ve böylece
iki yüzü farklı desenli bir kumaş parçamız oluyor.
Sonra kalımı üstüne koyup kesiyoruz ve fotoğraflarda görüldüğü gibi
katlayıp ütülüyoruz.
Ön kanatlardan birine düğmeyi dikip ipin ucunu peçeteliği bir kaç kez
dönecek şekilde uzun bırakıyoruz. (Düğmenin etrafında alttan bir iki kez
döndürüp düğüm atılırsa süper olur!)
İşte bu kadar…
Güzel, keyifli sofralarınız olsun…
I had wanted to share with you this project since so long time.
I had made this pretty project, firstly for Handmade Happy Craft
Magazine Summer Issue last year. You can find it and other issues on Dear
Claire Blog. Also you can see Claire Blog's beautiful new face.
A few month later I have made same project with an other fabric and
styling for Romantic Homes June Issue.
These fabric silverware holders would be perfect to brighten up any
meals and adding just the right touch to your table! It is great for a bbq
party or picnic where guests can easily take their tableware to their seat.
Also you can make it a lovely and unique gift to your loved ones.
These utensil holders which made of fabric and fastened with a wooden
button and bold color ties are great to add a splash of color to your
tablescape.
First, you’ll need to decide which fabric combinations you’d like to
use. I created a few different version. When selecting your colors and
patterns, consider the hue of your tablecloth and other tabletop decorations.
Materials:
·
2 Pieces
of patterned fabrics (appx. 12” x 9”)
·
Fusible
webbing (12” x 9”)
·
Sharp
scissors
·
A pencil
·
An iron
·
Neon –
Bold Color Thread
·
Wooden
Button
·
Needle
·
Template ( you can download it here)
Place your patterned fabric scraps on the adhesive portion of the
fusible webbing. Make sure your iron is on the “cotton / linen” setting and set
it so that there is plenty of steam and iron them slowly.
One side of the webbing is a very thin web of heat sensitive glue, the
other side is a paper that can be drawn on easily – it is transparent enough to
see through. Peel off the paper backing.
After you remove the paper, there will be a very thin layer of heat sensitive
glue remaining on the fabric. Place your other piece of fabric on this face and
iron them again.
Trace your wrap template with a pencil, carefully cut the shapes out
around the lines. As you see on the
image, fold 3 sides and iron. Sew a wooden button and tie a bold thread.
Then you’re done! It’s just that easy to make fabric utensil holders to
add to your table decoration. It doesn’t take too much effort to do.
That's all...


